#divi #hosting #divihelp @shepherdsloft @elegantthemes @eventsreplay @pressable
Divi Help Introduction
This video is about converting a custom WordPress theme to Divi. We will walk you step-by-step through a couple of different strategies for converting your theme, and then show you how to do it using the Divi Theme by Elegant Themes.
Converting to Divi – Strategies
Our strategy is to install and use the Divi builder plugin so that we can design a page with the Divi builder while the custom theme is still active. Then we want to install the Divi theme and switch the themes over. We can remove the Divi builder plugin after the switch is complete.
We’re doing this on a live site, which is only one page. I don’t really want to go through the whole process of setting up a staging site, changing IP addresses, and all that goes with that, because it’s just a small site. We’ve got our Divi builder plugin installed, which allows us to use the Divi builder on any page we want to use. Let’s go ahead and start a new page.
Design Goal
We are pretty much going to mimic exactly the design that is already here, because this is what the customer has already approved, with some small improvements. It looks like everything is bold, but it doesn’t need to be, so let’s go a little less bold on the letters there. Let’s also make some small layout adjustments where things aren’t quite lined up or just don’t look quite right. This gray against the side of the box…too much space up here, not enough space there, and too much space above this part. We’re going to go through them and we’re going to make some minor design changes, but the goal is to just rebuild this page the way it looks. Here’s our new page, and this is going to be our new home page. We’re going to label that page so we know which one it is, and we’re going to launch our Divi builder.

Choosing a Divi Layout Process
When we’re building a new website, it’s great to start with a predesigned layout and add our content in it that way, but in this case we are converting the current design over; we want it to look as much like the original as possible, with some improvements. So we’re just going to jump into clicking “start building”, and then, when it gives us the choice to build from scratch or to use a premade layout, we’re just going to choose “start building from scratch”. If you’re having trouble using the Divi builder plugin with a particular theme, you can always use another WordPress install and design your page, export the layout, and import it back into the site that you’re trying to change. That’s what we’re going to do now: we’re going to click on “start building”, and we’re going to get started replicating the design.

Discovering the Fonts Used for Design 6:10
Using the inspector, we can right-click, open the inspector, and find the font. By filtering through we can find the font that was being used – Roboto medium.

Using the Divi Library 28:52
Now that we’ve got our design layout roughly complete, we’re going to save it to our Divi library – we’ll just call this our Core Homepage – and save that in there, and now we can exit out of our visual builder. Then we’ll go to our Divi library and we’re going to export the design layout that we just completed. So we will check that layout and we will click on “Import/Export”, and export that to our desktop.

Now that we have our Divi layout completed and exported, we’re going to go back into the website that we’re working on. We’re going to go Divi, and then Divi library, and then click on “Import”. Then we’re going to import the design that we just completed.

Switching/Activating the Divi Theme 30:29
Now we’re going to go over and make sure we’ve got our theme installed. Before we activate the theme, we’re going to go back to the original website and get some screenshots of it as it is now, before we change it over. That way we can have a before and after, and make sure that we didn’t miss anything.
Sometimes you can use a text editor like Notepad or on the Mac you can use Text Edit. I like to make it plain text so that it strips out all of the HTML and everything. Then I can have the information that I want without formatting. So I was missing this little bit of text at the top and a little bit of information in the footer, but I got that on the text pad, so when we get the new theme activated and the new layout added, we can come back and add this remaining content. We can do a live preview here, after the installation.
There’s not much to see because the layout has not been set to the homepage yet. We’ll go ahead and activate and publish, and then we’ve got to step through doing the menus and the footers and the homepage layout.
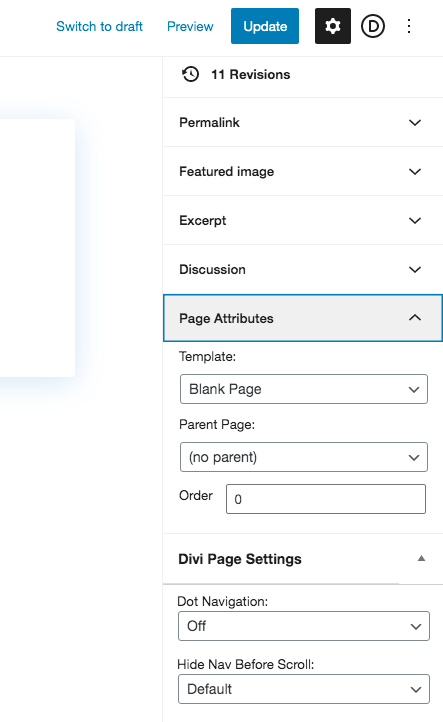
Changing the Page Template 34:03
We are going to change the layout to a blank page, and we can only do that from the editor. We’re doing that because we don’t need the logo – or the logo is already part of the design – and there are no other pages. So we can change it to a blank page, and then add the layout that we’ve already created.
If you’re trying to select “load from library” and you don’t see your saved options, just click back and forth between the two different tabs, and then it’ll show up.
Presto! There we go! We’ve got our new layout here. So now we’re going to save this and then we have to come back and add a little bar and some footer things, but right now we’re going to save this and we’re going to go activate it and make this the new homepage so that we don’t have a messed up page on this live site. We’re trying to do this quickly – within five minutes. So we’ll need to exit the visual builder and then go to our WordPress reading settings, and we can set the new homepage as the homepage of the website.
Now I’m on the other tab. This was cached in from earlier; I haven’t refreshed the page yet. I’m going to hit Command R (you can press Control R or you can click the little circle on your browser window) to refresh the page. And when this refreshes we should see the new design, and we do – it’s fantastic. So here is what we have so far, and we’ve got our screenshots, so we can go back and do any little necessary touch-ups. I think the layout is already looking much better, cleaner and tighter. We need our footer information at the bottom, and we probably want to add some red headings, but we’re going to do that with a Divi customizer instead of customizing each individual heading on the page – let’s do that first. Let’s go to our theme customizer.
While that’s loading up, we want to retrieve the exact shade of red that’s in the logo. So I’m going to open up the logo in a graphics program – I’m still using Fireworks, one of my favorite programs. Using the ink dropper, we can select the red color and then open that up and get the RGB color, BB2031. I’m going to copy that to my clipboard.
Using the Theme Customizer 37:55
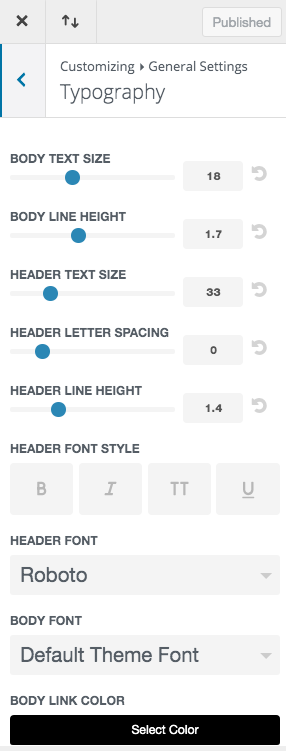
Setting the heading font
We’re going to go to our settings in the theme customizer and set the heading color to red. I remember the font we were using was the Roboto; unfortunately we will have to scroll down to find that.
The cool thing here is if you do not use custom settings on your headings on the actual page, then you can control all of them at the same time through the theme customizer. So once we’ve got these sets, then we can go back. Even on the page, if we set it to the default font, size, color, and everything, then it will be much easier to adjust everything. You can see this has already turned red and these turned red for us. This was a graphic and this turned red for us as well. So we were able to control all of these and change all of these at one time by just using the theme settings.

Setting Color Selections 39:48
Since I’ve got the red RGB color or HEX color on my clipboard, I’m going to go down to my Divi theme options and make sure that color is saved into my palette, so that when I’m designing on the page I can choose that specific red.
Pressing the enter key will show you the spinner, which will save your settings. So now when I enable our visual builder, we should be able to have that red color available to us. We’re going to add a little red bar at the top like there was before, and copy and paste in our text.

Building the Footer 43:08
Now we’re going to work on our footer section. We want to get this looking like it did before with the two logos at the bottom, but we’re not going to include that little Facebook icon. We’ll come back and add that to the top navigation or somewhere else, or wrap it into the footer so it’s cleaner.
Managing your Text Colors 45:09
Instead of selecting all the text and changing it to white, there’s a feature called Text Color. If you look up that feature, you can just click the dropdown and change it to light, and it will automatically make the text white. So the dark color is the color that’s assigned in the theme options or the theme customizer, and light is just always the reverse, or the white version of that text. So then you’re not applying any local styles on this page to your text, and you can always just come back and switch this back to dark, and you’re good to go.
Adding the Logo to the Footer 46:59
This is not the ideal way to scale an image, but it’s already been used on the page. The better option would be to make a copy of that little logo and resize to match the other one. Okay, we’ve got everything in except for a little Facebook icon.
Setting Up the Header: Logo and Navigation 47:40
We’ve completed the homepage redesign and conversion of the theme over to Divi theme, so we’re on the last part of the project. The homepage is all done but the subpages are not completed. If we click here to our donation page, which is using WooCommerce, we can see that our logo and all of our navigation is messed up, our right sidebar is pretty much empty, and our footer is somewhat incomplete, along with the social icons at the bottom. So in this last part of the video, we’re going to clean up what I like to call the furniture of the website – the header and the footer and the sidebars. So we’re going to clean all these pieces up so that the website is complete. We can start in with the navigation: setting our logo and maybe just having a home button there and a donate button, and then we’ll work our way down.
Inspecting and Resizing your Logo 50:12
When we right-click and use our inspector we can see “intrinsic” is 225…251…I usually make the logos at least 100 pixels tall. This one will scale a little bit, but it needs to be a little bit bigger to be able to see it.
Changing the Number of Footer Columns 54:59
So currently our footer has probably got three or four columns in it. We want to make it two columns so it matches the home page. So we’re going to go to the theme customizer and change the layout back to two.
Thank You 55:23
We have our subpages looking good, and I believe that completes our project. We’ve got a new homepage and new subpages set up, and everything’s ready to go. I would like to thank our sponsor, Pressable, the Shepherds Loft Team, and Will at Events Replay for editing our video. I’ll see you in the next episode! Be sure to like, comment, and share.